My First App: How I Built a ML Model with No Experience
At the end of last week, I was very sorry to say goodbye to a project I have poured my heart into for 9 months. Thankfully, the reason for the goodbye was exciting - it was finally the launch date, and I have a new job elsewhere, so it was a sweet end to a loved project.
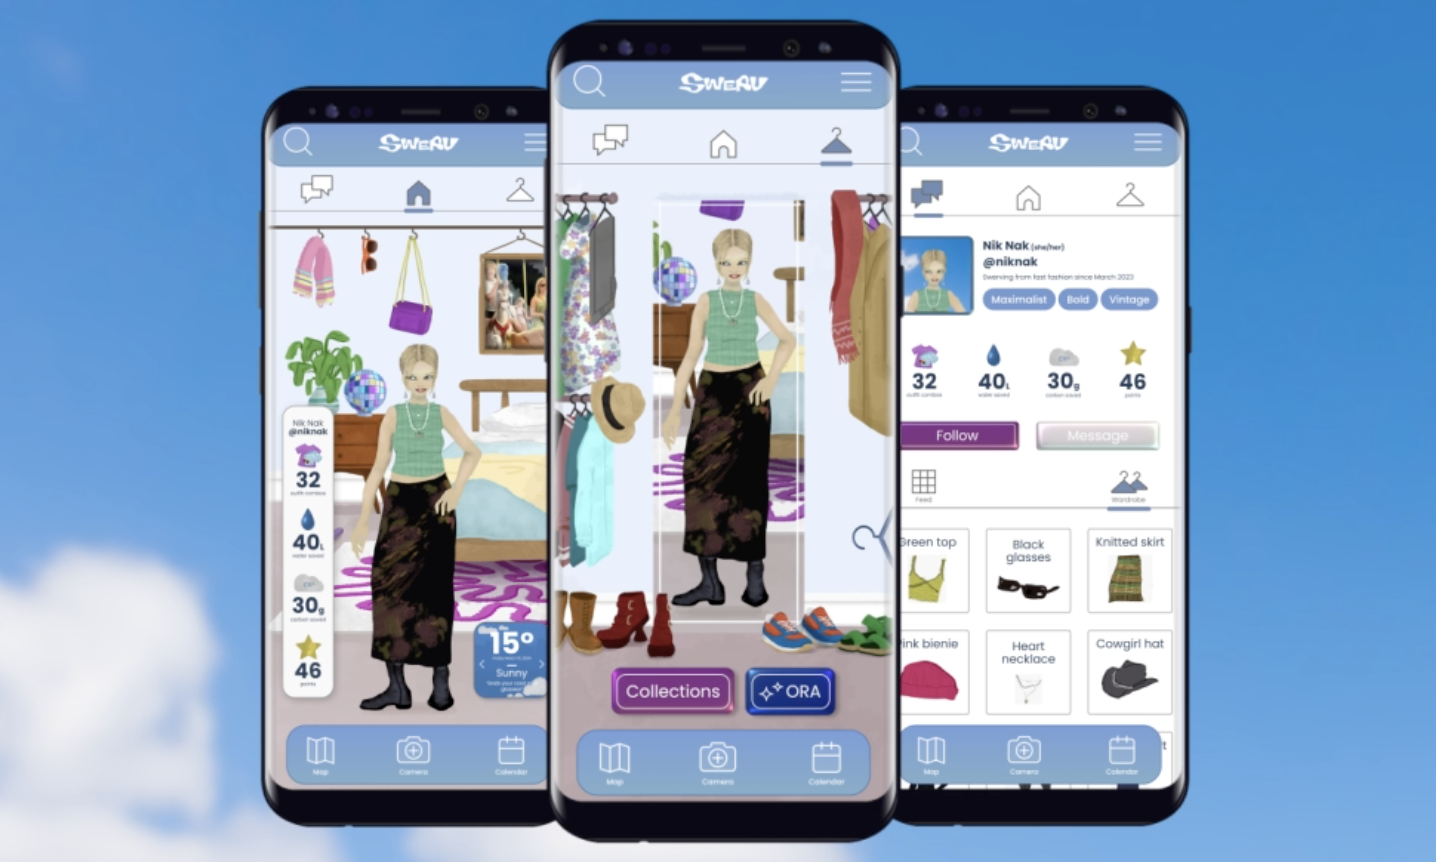
The application is called Swerv, though it may not yet be available in your region. It has been produced by the incredible team at Weaving Change, a Bristol-based (UK) start-up whose mission is to raise awareness about fast fashion and help users fall in love with their wardrobe again.
To do this, Swerv leverages AI to allow you to digitalize your wardrobe, placing garments of clothing you scan on your custom avatar. The categorisation of clothing based on a taken image is done through ClothingCAT, a computer vision model running on TensorFlow that I had the absolute pleasure of building. Then you can also use ORA (Outfit Recommendation Algorithm), a ML model using transformers that predicts the compatibility of your outfits on a scale of 0 to 1, and then allows you to tweak this through CD to tailor the model to your preferences (shout out to Will Mills for his fantastic work on this. He is truly an extremely smart developer worth following).
I started this job early February this year, and my initial task was to improve ClothingCAT’s accuracy. The amazing Will Terry-Wright, my supervisor on the project, had already built a very simple MVP running on TensorFlow (using Keras) and MobileNetV2, but the accuracy at the time was around 60%, with around 500 labelled images to train the model (structured learning), no data augmentation methods implemented and very non-uniform data, which may also be exaggerating the val_accuracy. The reason is as follows: say you train your model to recognize clothing categories by giving it 500 images, but the data is not uniform - 450 of those images are of t-shirts, which means that if the model outputs t-shirt, it is correct 90% of the time. Then the model becomes “lazy” and will output t-shirt way more frequently than the other categories, not because it’s actually analyzing the image, but because it is trained to output t-shirt. Thus, data uniformity is one of the most important aspects of building an accurate and impervious ML model.

This was the initial data, with the custom images (I believe these were taken and labelled manually by a pool of tester users).
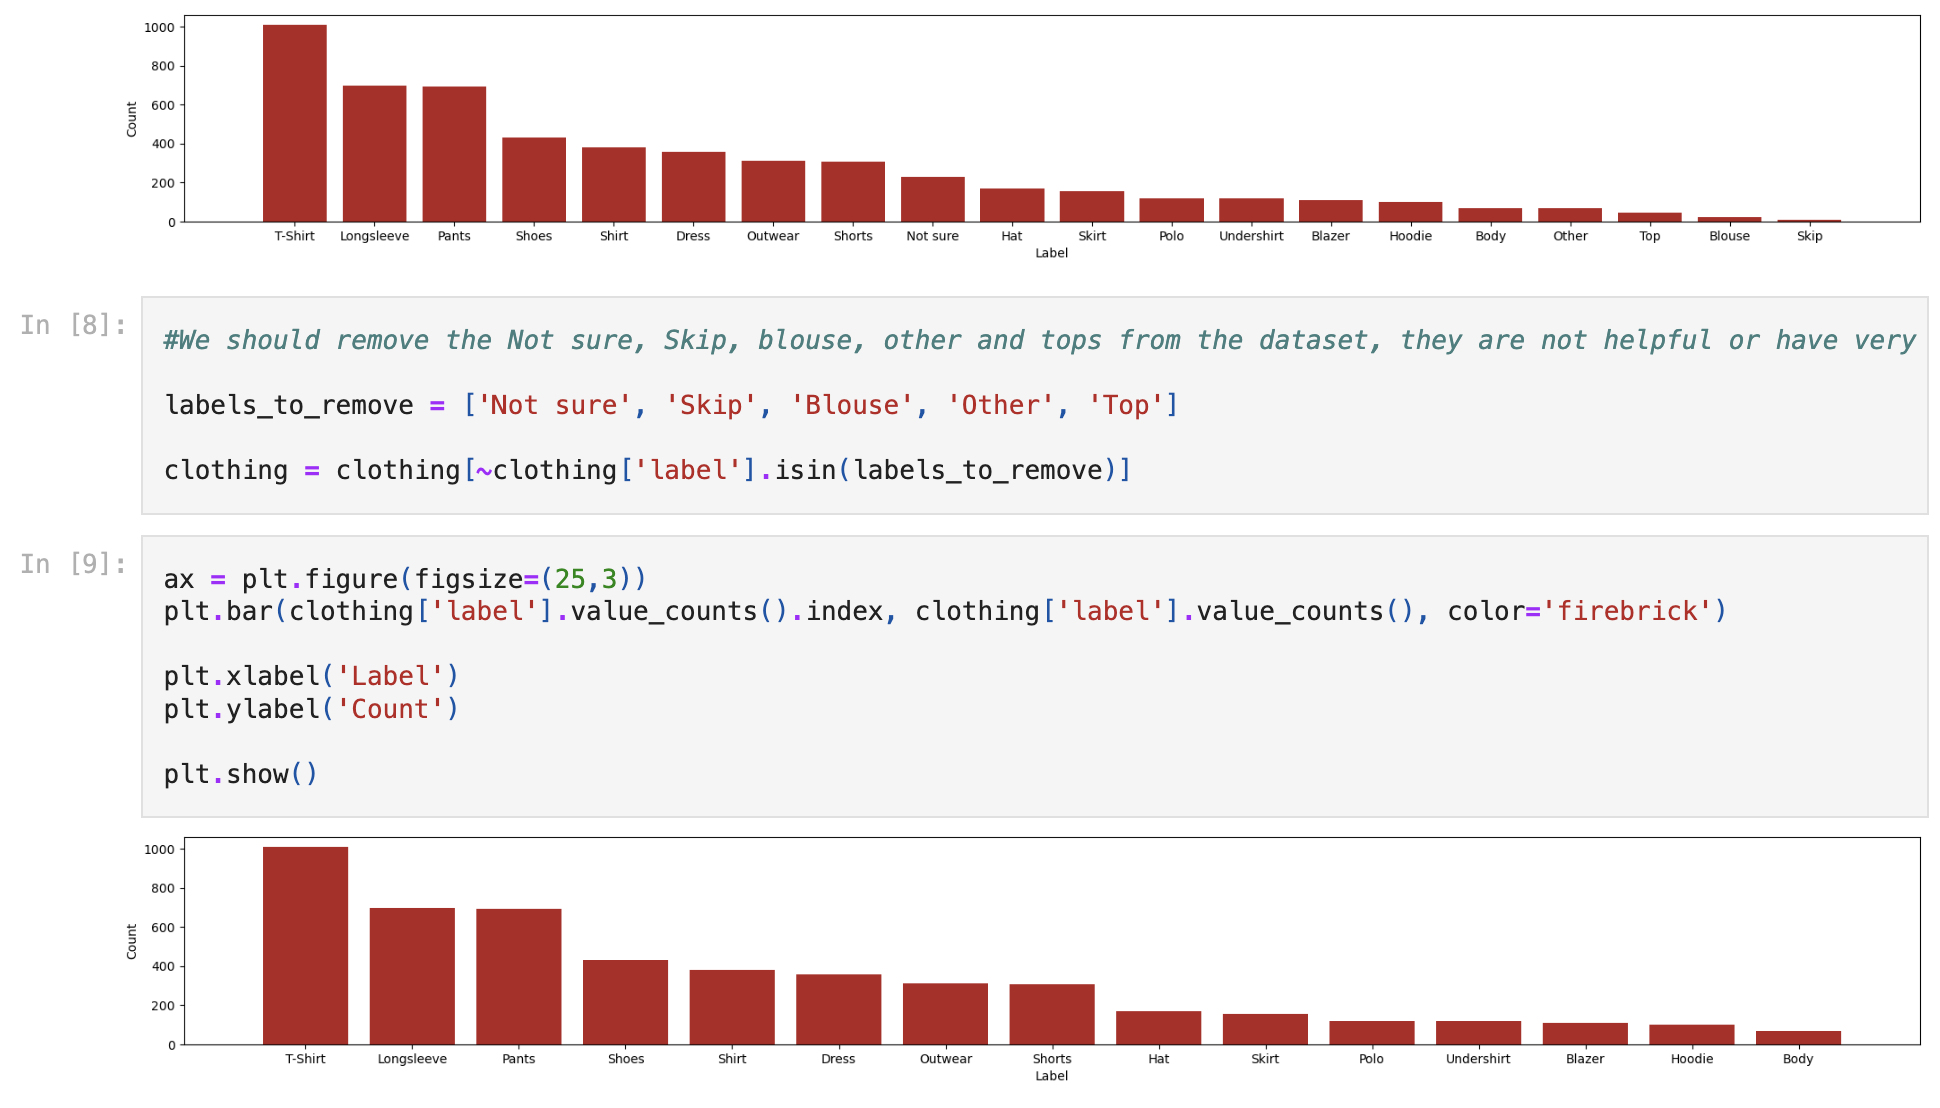
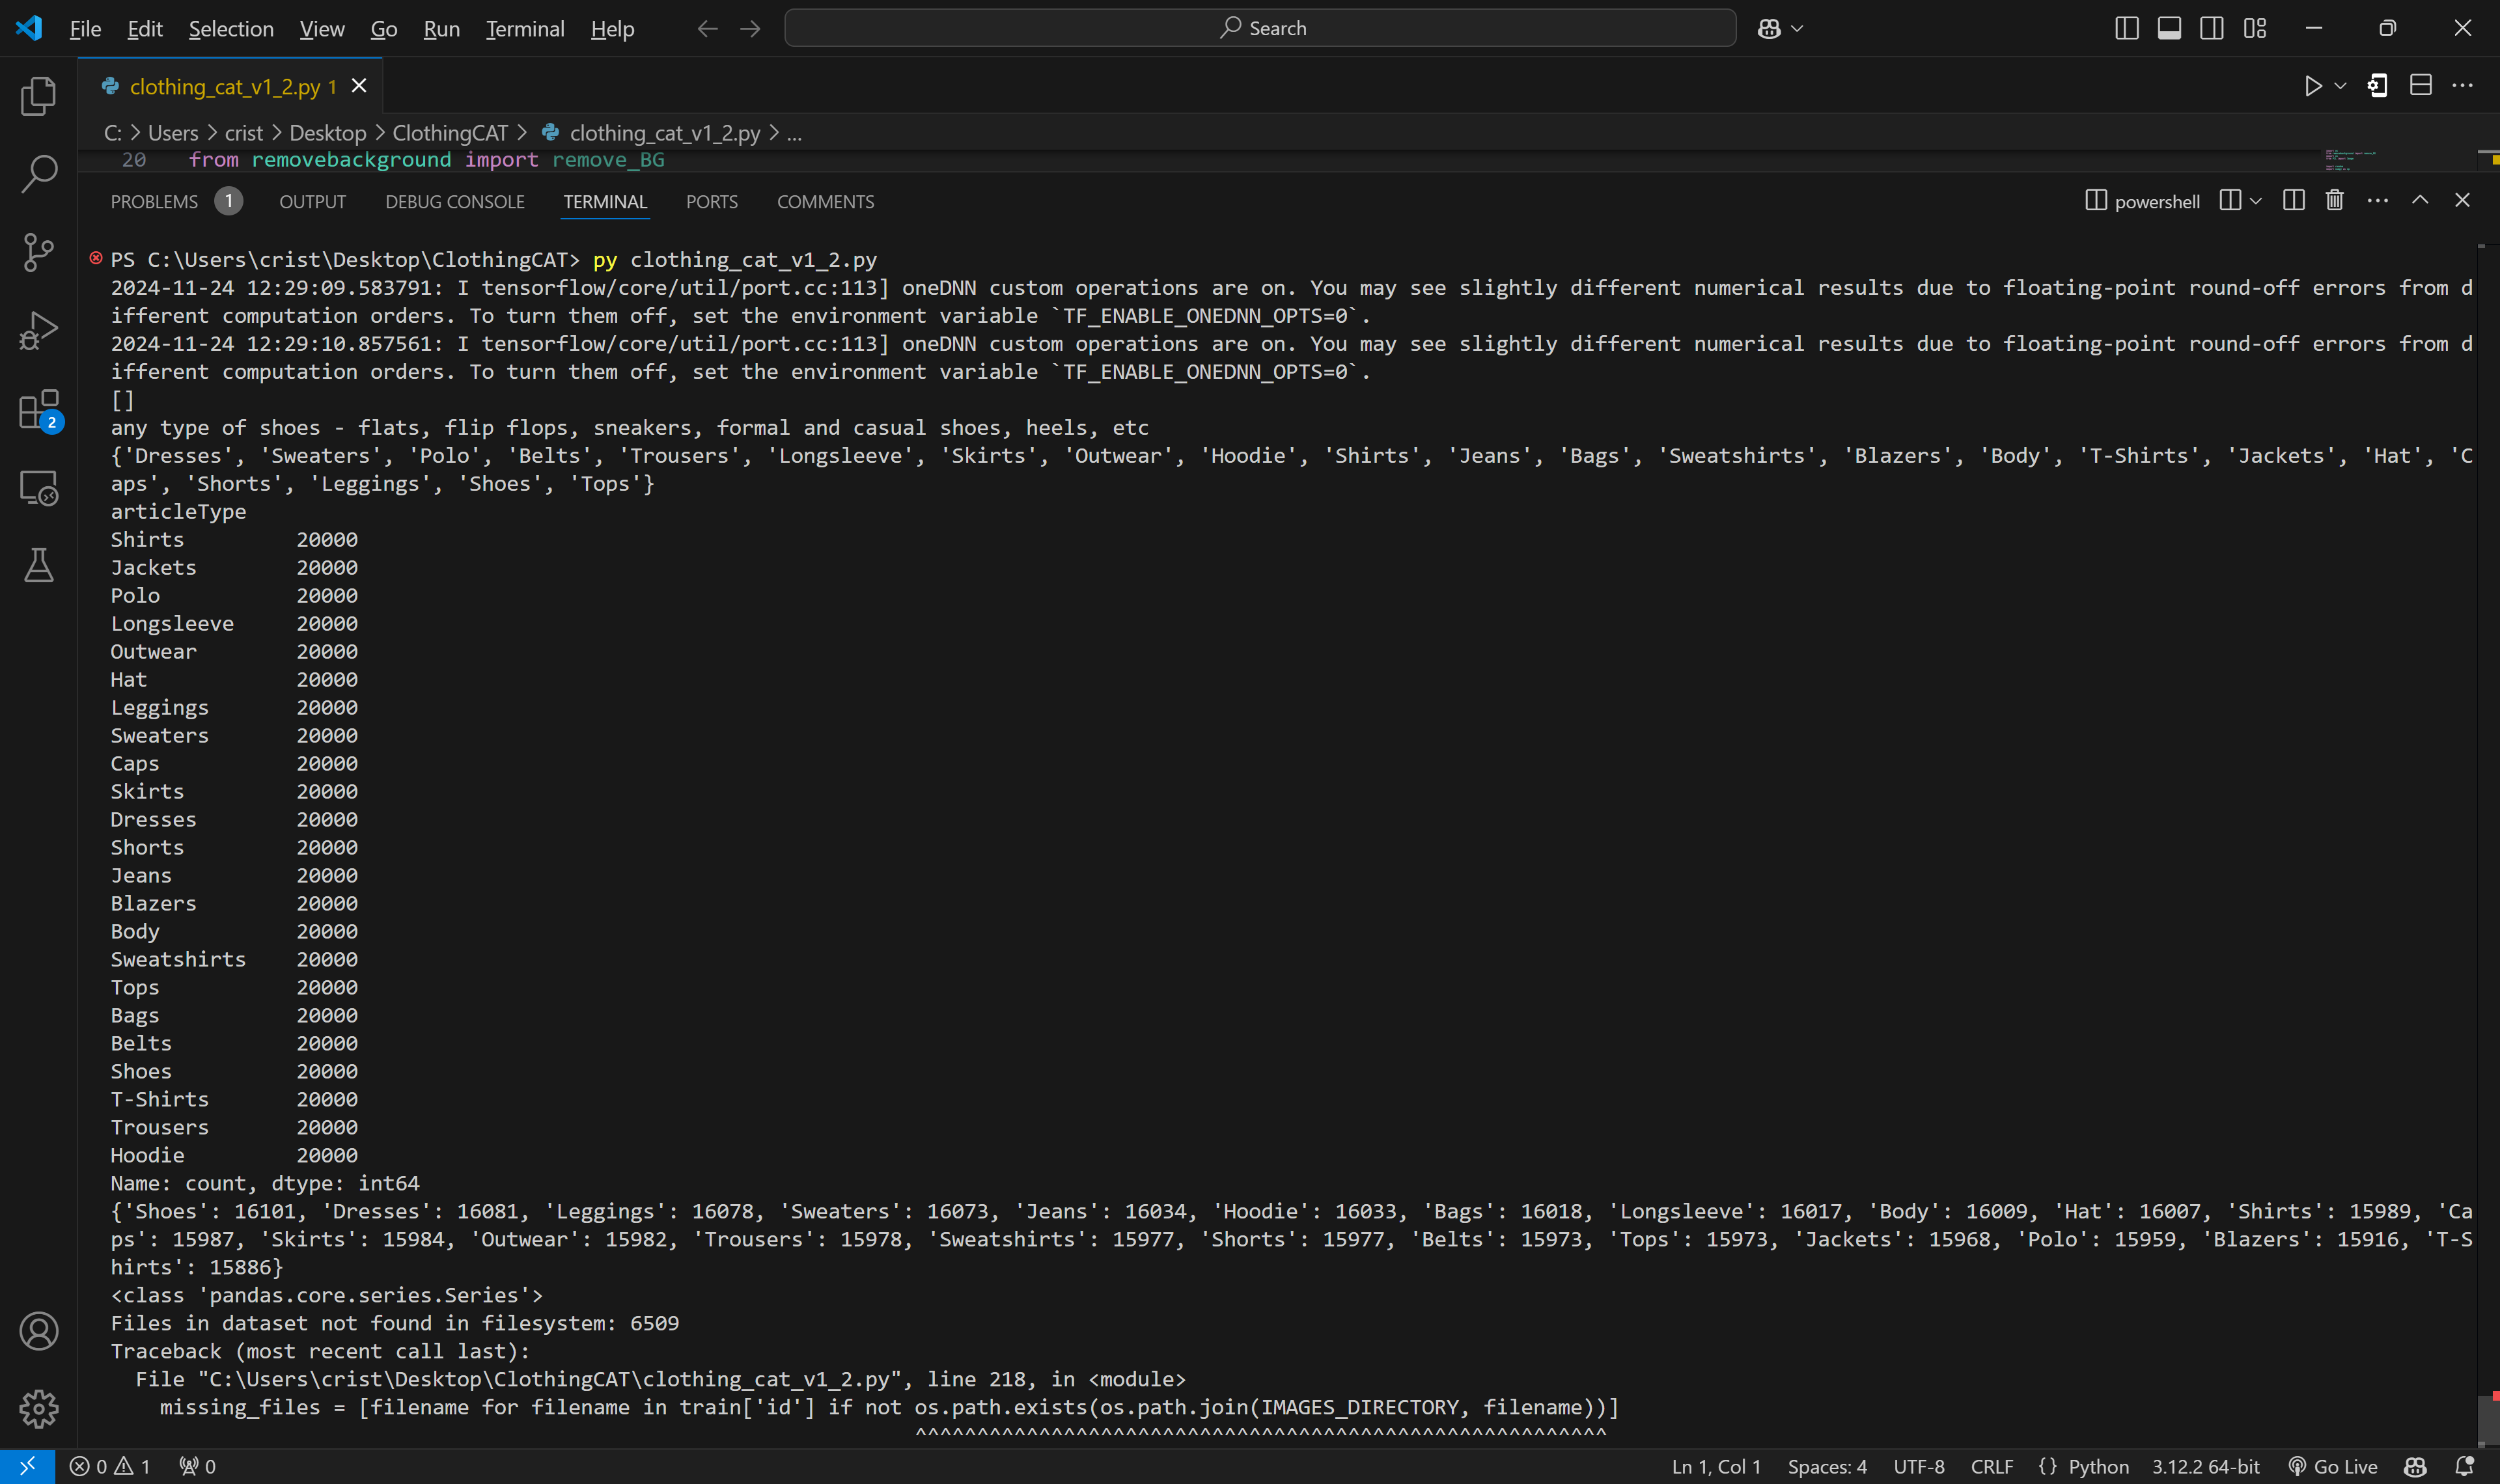
Then most of the work became using panda to filter through categories, and matplotlib to visualize the dataset
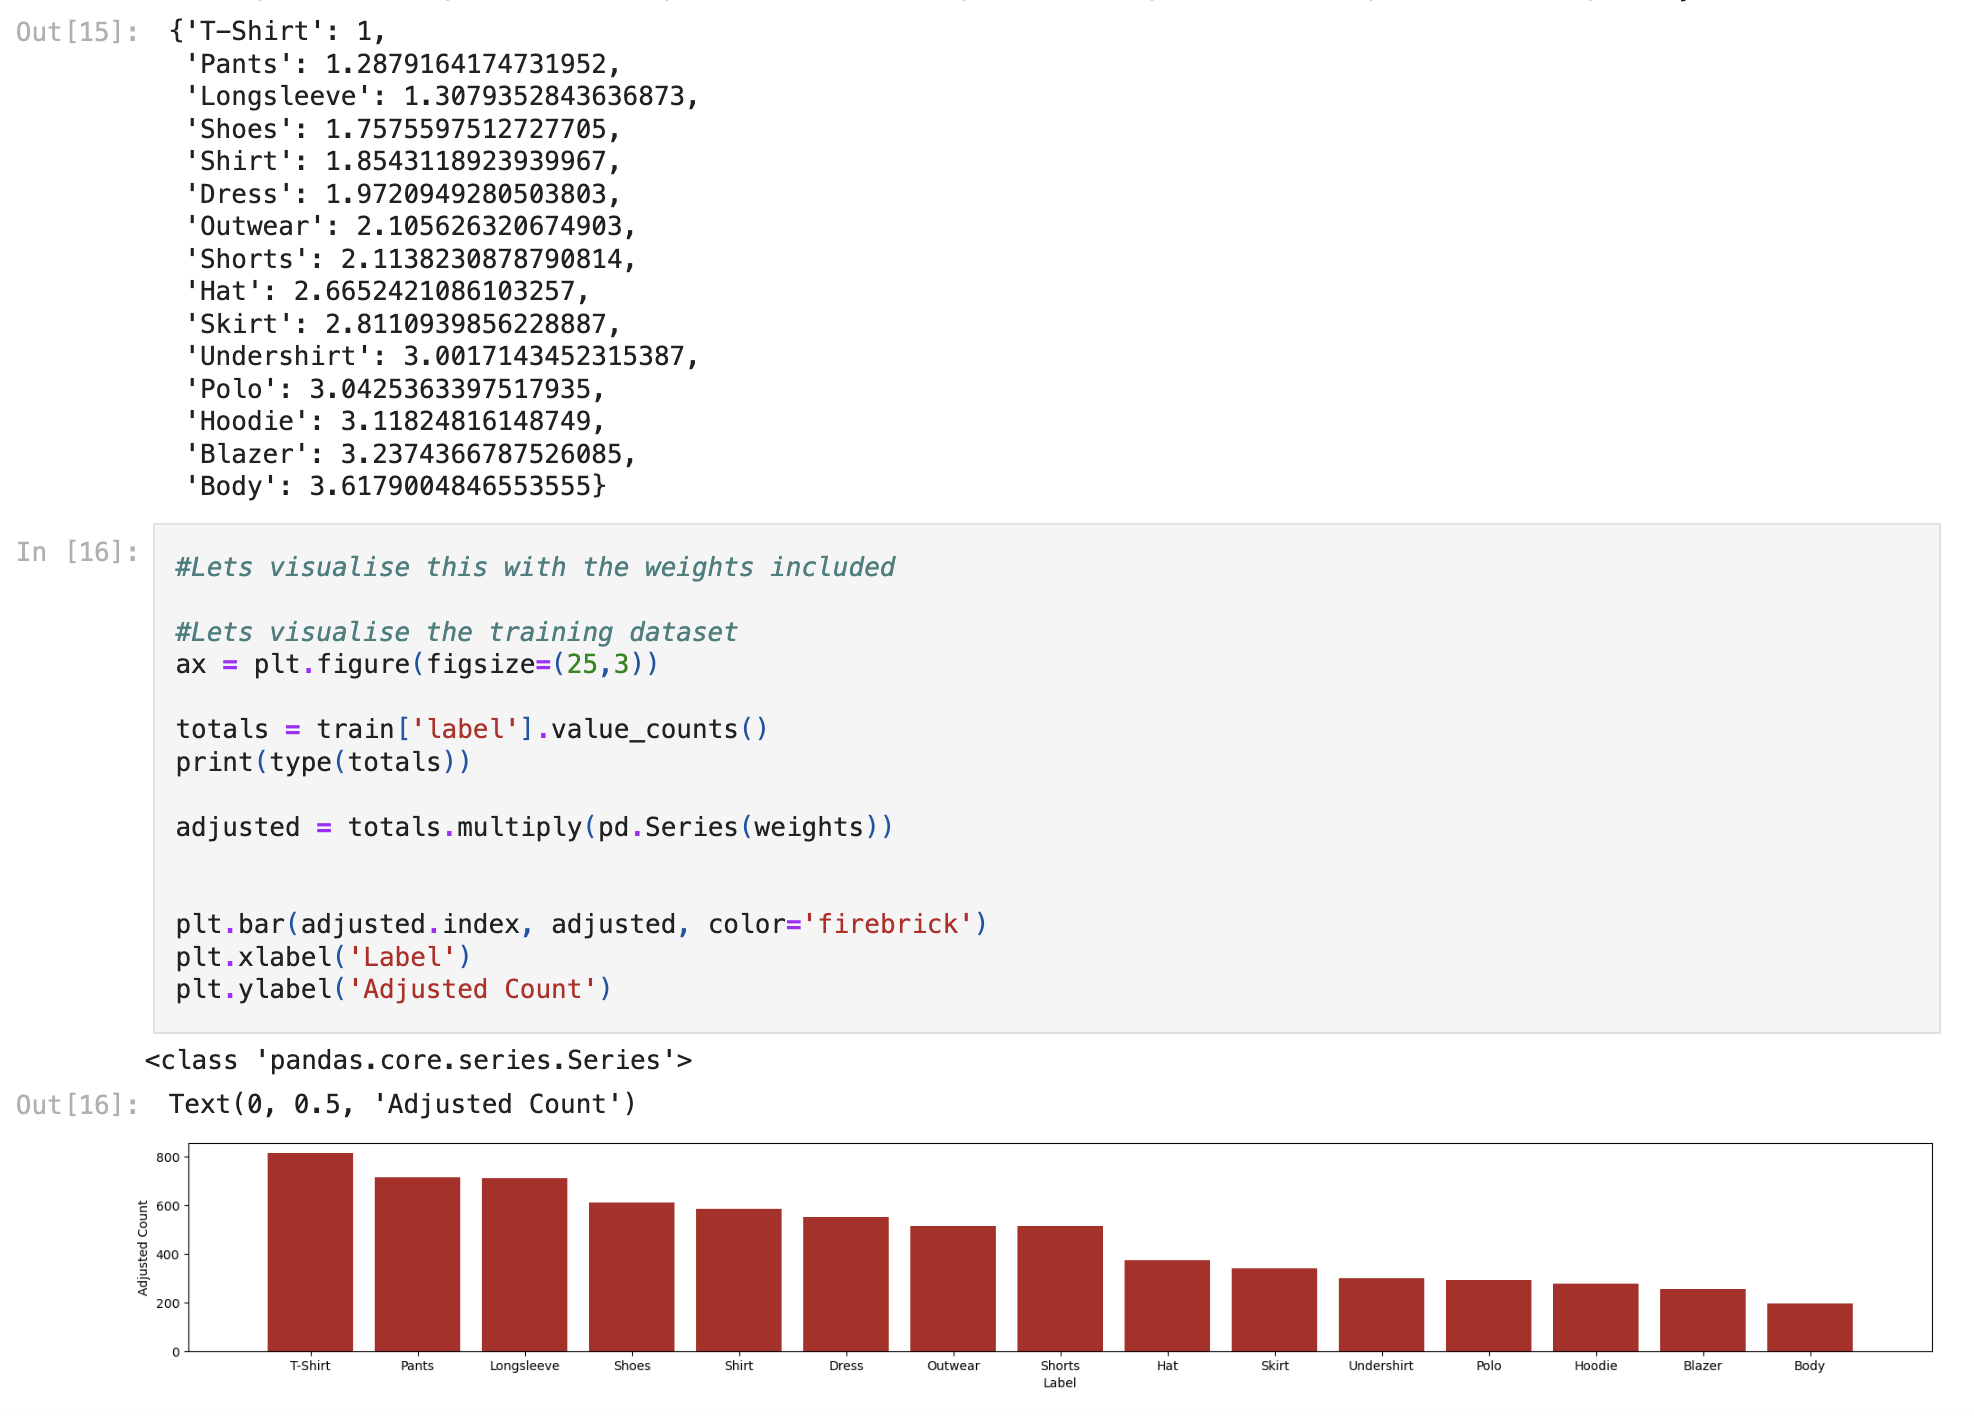
Our initial approach to improve uniformity was adding weightings, which did help, but as we will see later, data augmentation ended up being a much better approach.
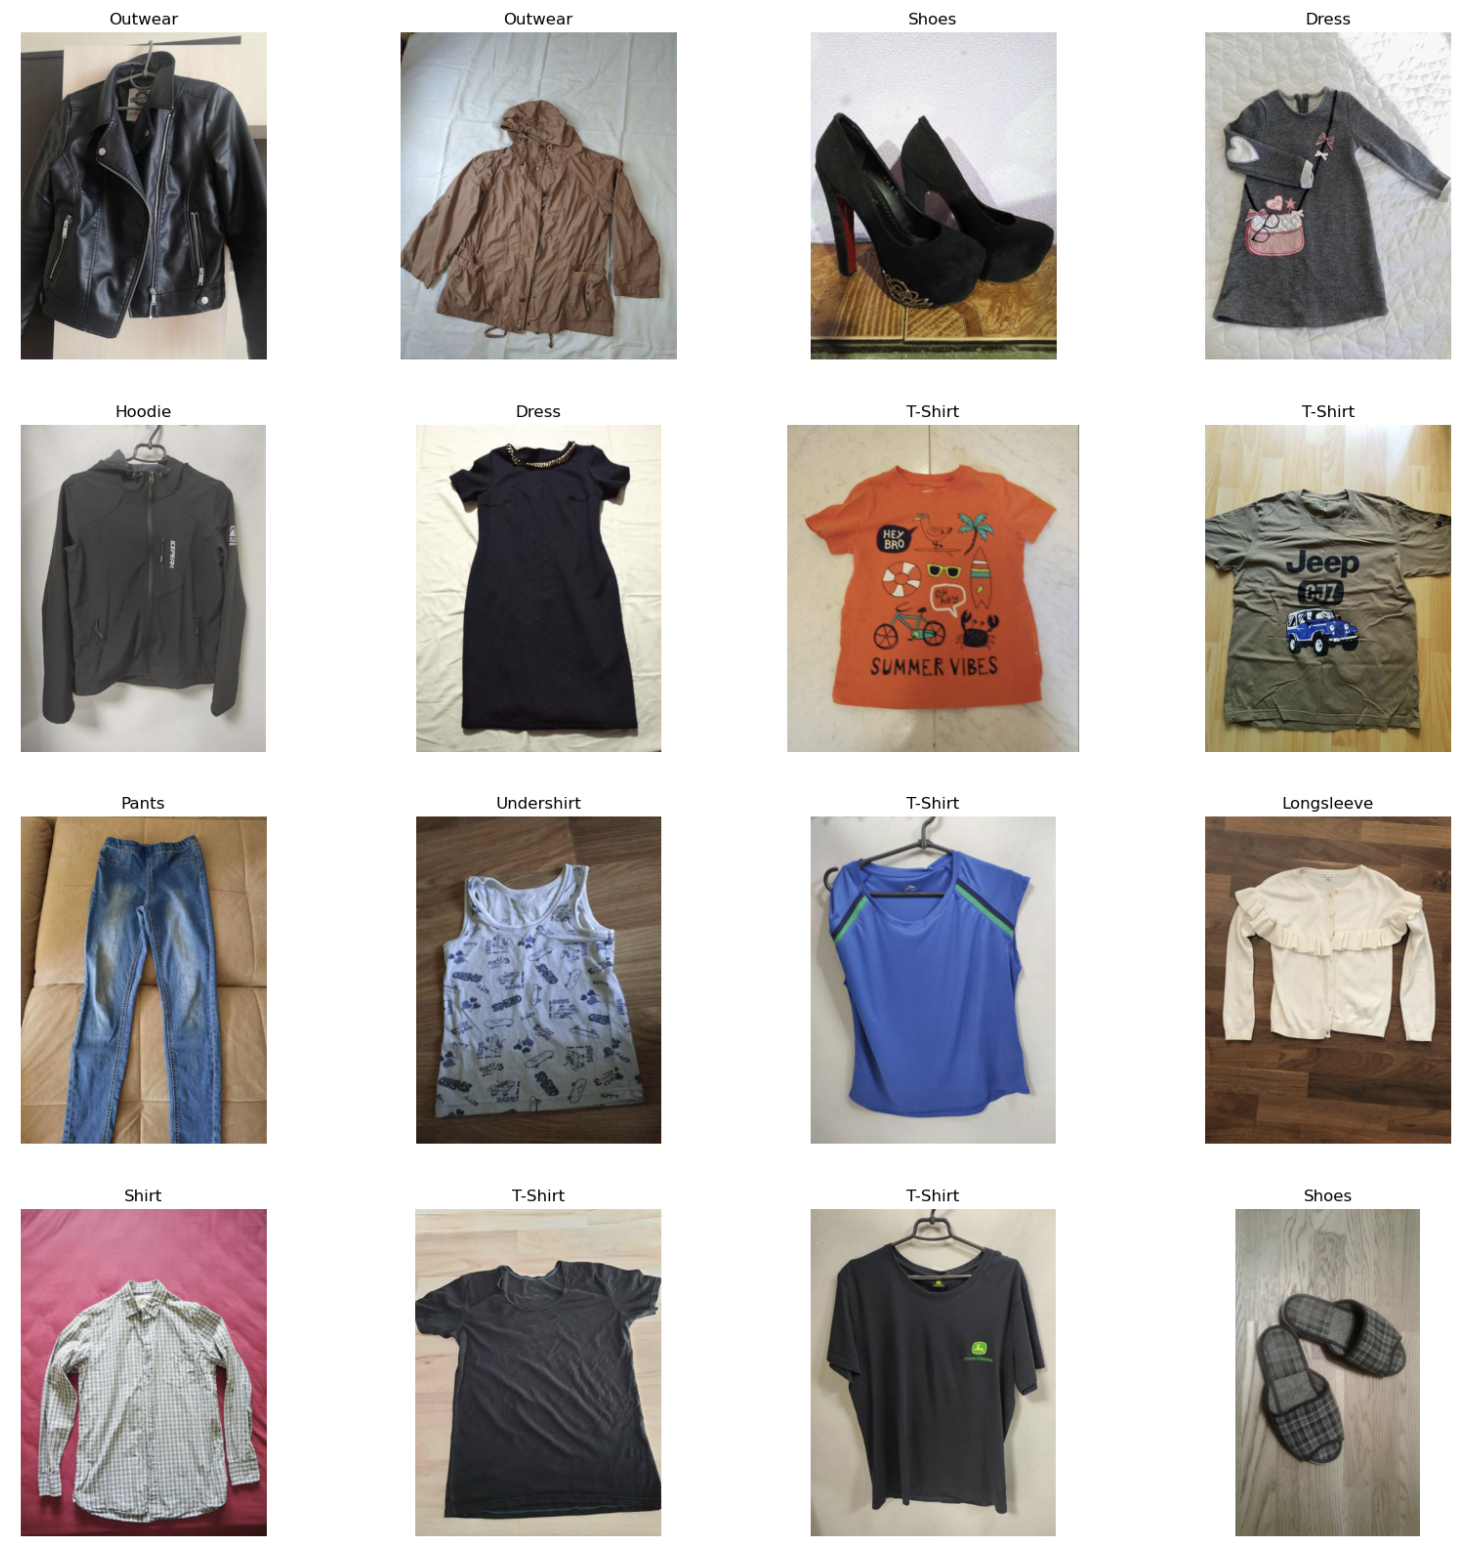
These are some of the initial clothing images we trained the first model on.
And the final dataset we ended up adding to the initial dataset.
Therefore, my main mission was to tweak the architecture of the model, expand the dataset A LOT while making it uniform, and adding data augmentation techniques.
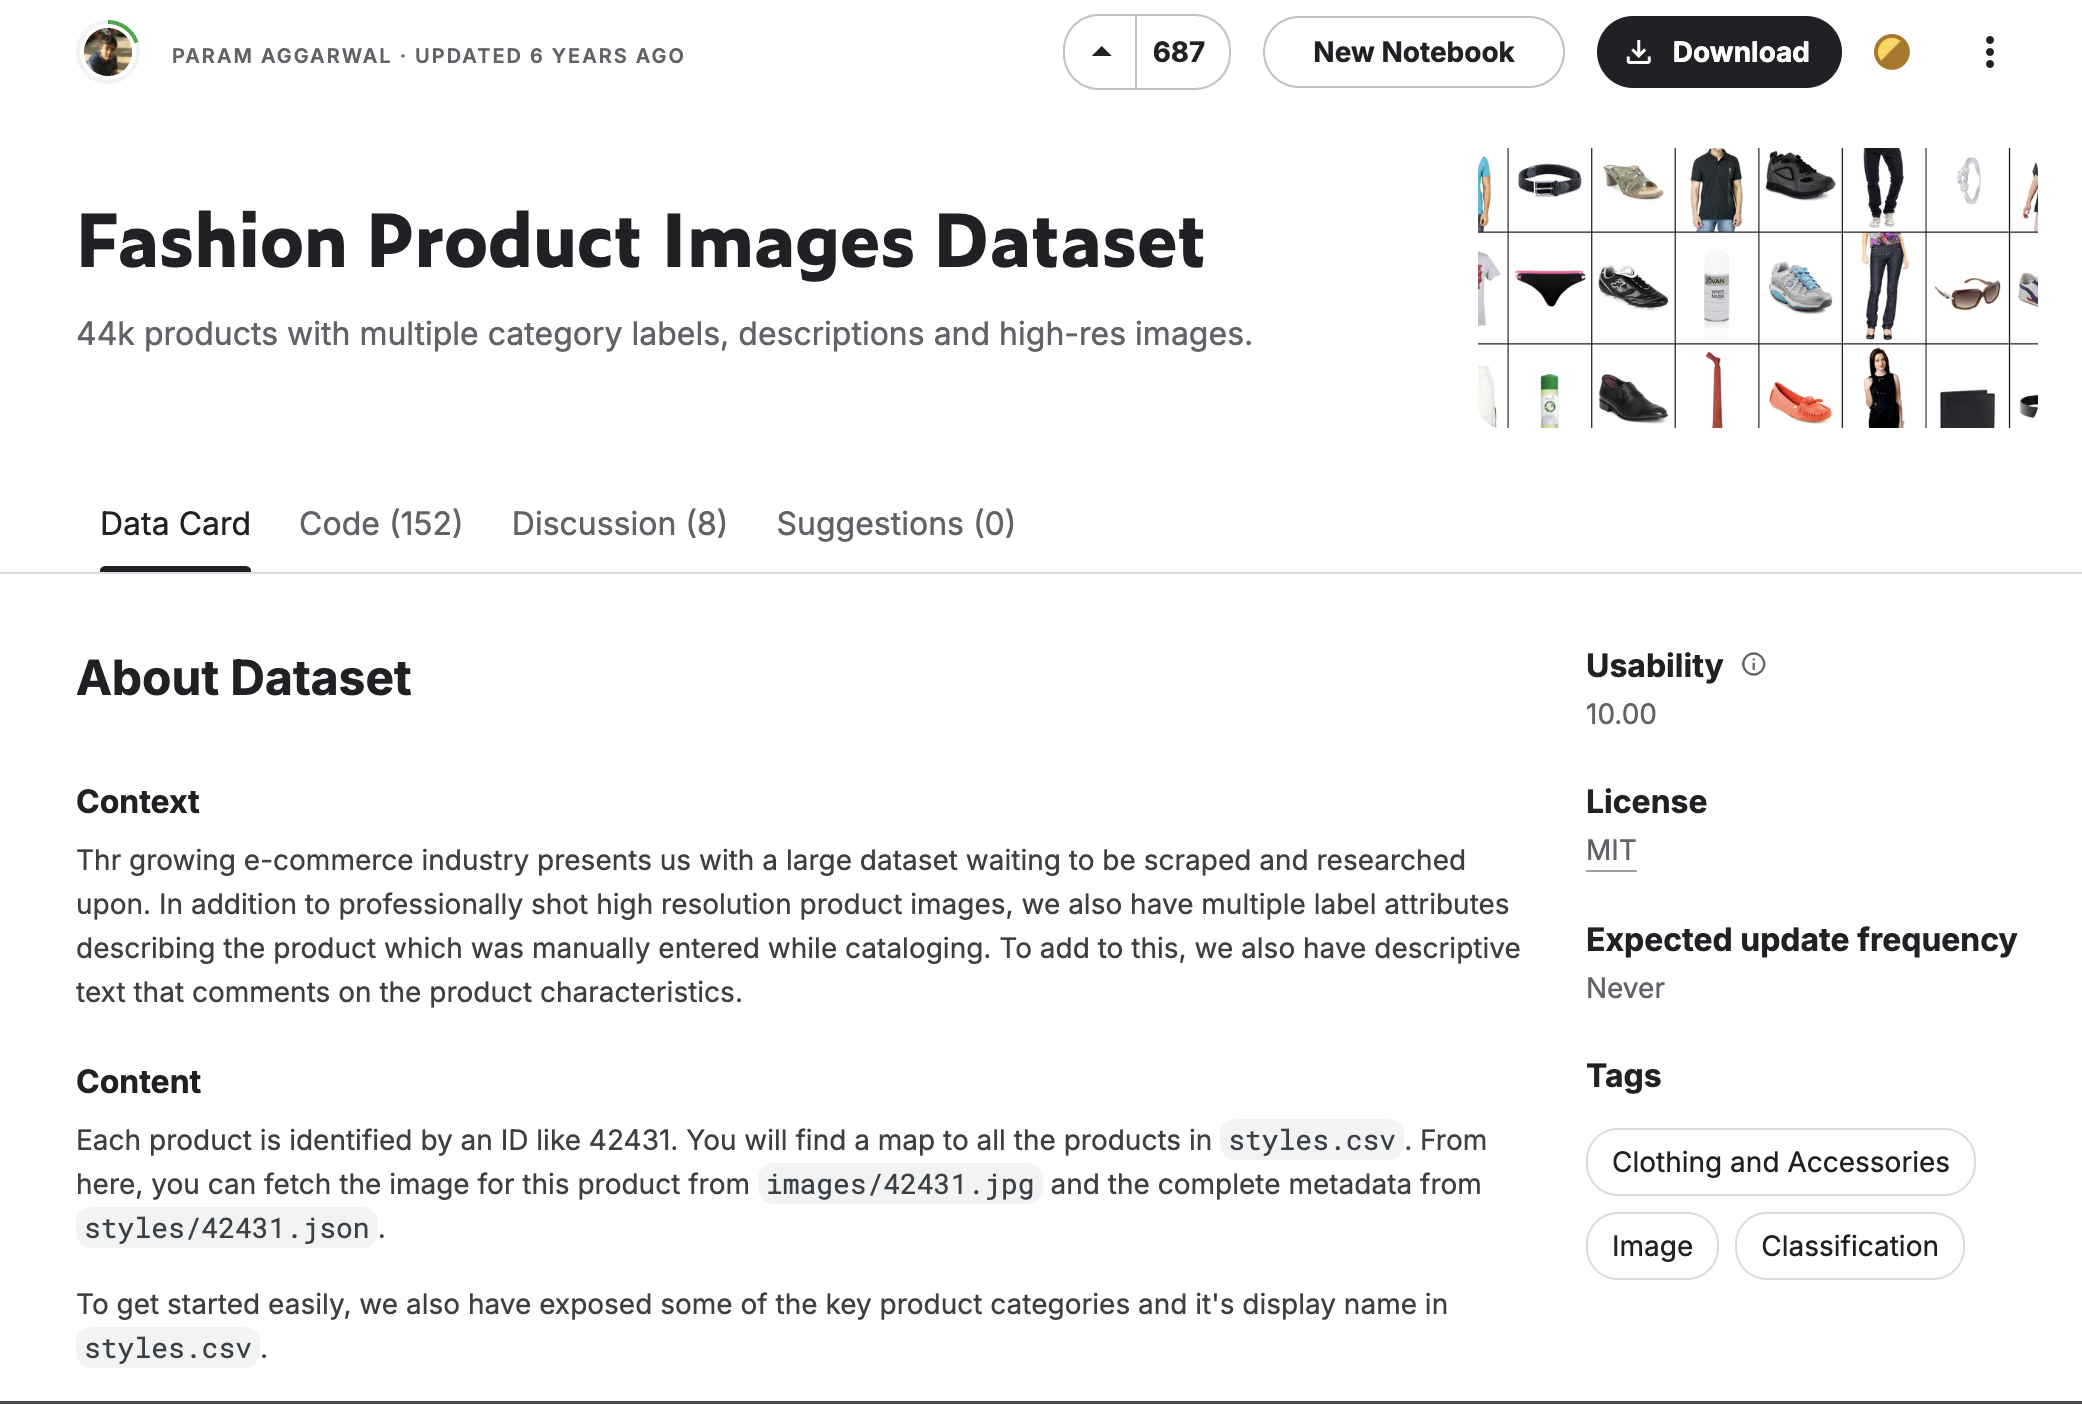
I found that, if you’re lucky enough to be making a computer vision model on a common enough functionality, you don’t even need to worry about going out in the wild to find your own images and do the laborious work of labelling them. You can simply go on Kaggle, an incredible free dataset repo, and find what you’re looking for. I ended up finding the fashion-dataset, which had around 44k images and a lovely csv that gave me all the data I needed. If I remember correctly, I was only able to use around 5k images, due to the target categories we wanted. But through data augmentation, the final number of images we trained the model on was just above 32k.
For augmentation, I was recommended the package albumentations by Will Mills, and it was both easy to implement and worked perfectly. I guess the advice here is: listen to smart people. And in case you are not familiar with data augmentation, it is essentially a way to extend a dataset by tweaking images slightly, like stretching, rotating or adding filters. This is because the model will still learn a lot, as reflected shoes are still shoes, but the model may not have recognized them placed in that direction otherwise, and so on.
1
2
3
4
5
6
7
8
9
10
11
12
13
14
15
16
17
18
19
20
21
22
23
24
25
26
27
28

import os
import cv2
import albumentations as A

# Path to the 'output' folder containing the images
output_folder = r'C:\Users\crist\Desktop\ClothingCAT\output'

# List all image files in the 'output' folder
image_paths = [os.path.join(output_folder, f) for f in os.listdir(output_folder) ]
# print(image_paths)
print(len(image_paths))

# Define the augmentation
augmentation = A.RandomBrightnessContrast(p=0.2)

for image_path in image_paths:
    # Read the image
    image = cv2.imread(image_path)
    # Check if the image was successfully loaded
    if image is not None:
        # Apply the augmentation
        augmented = augmentation(image=image)['image']
        # Save the image back to the same path
        cv2.imwrite(image_path, augmented)
    else:
        print(f"Failed to load image: {image_path}")
Because the backgrounds of the dataset are all white and this is not very representative of the real life images users would probably take, Will TW whipped up an entire background removing tool using AI in a WEEKEND (seriously, this guy is nuts!) that we could use before passing user’s images to the model.
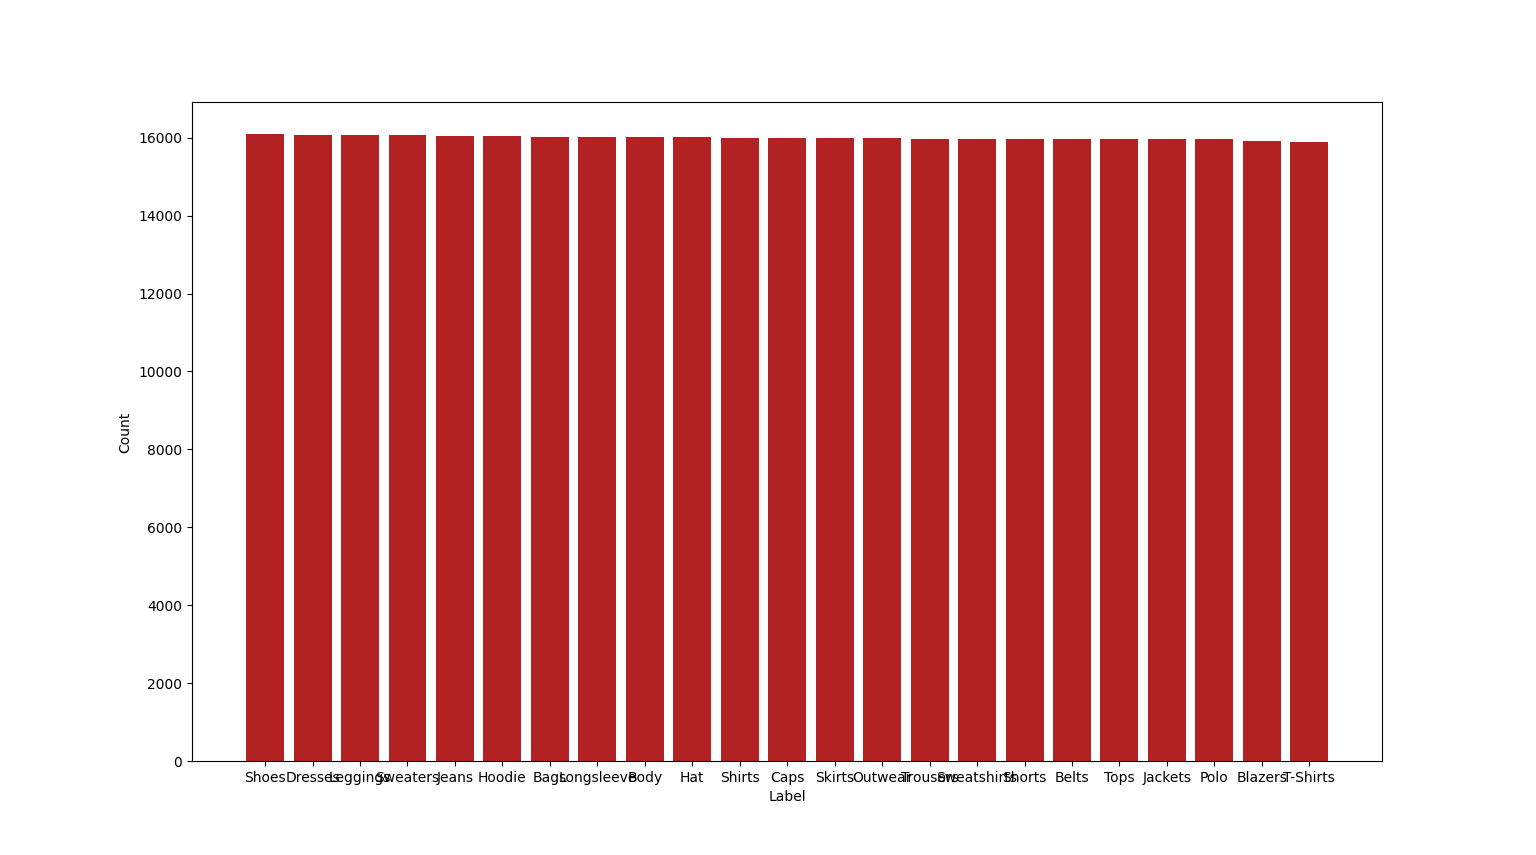
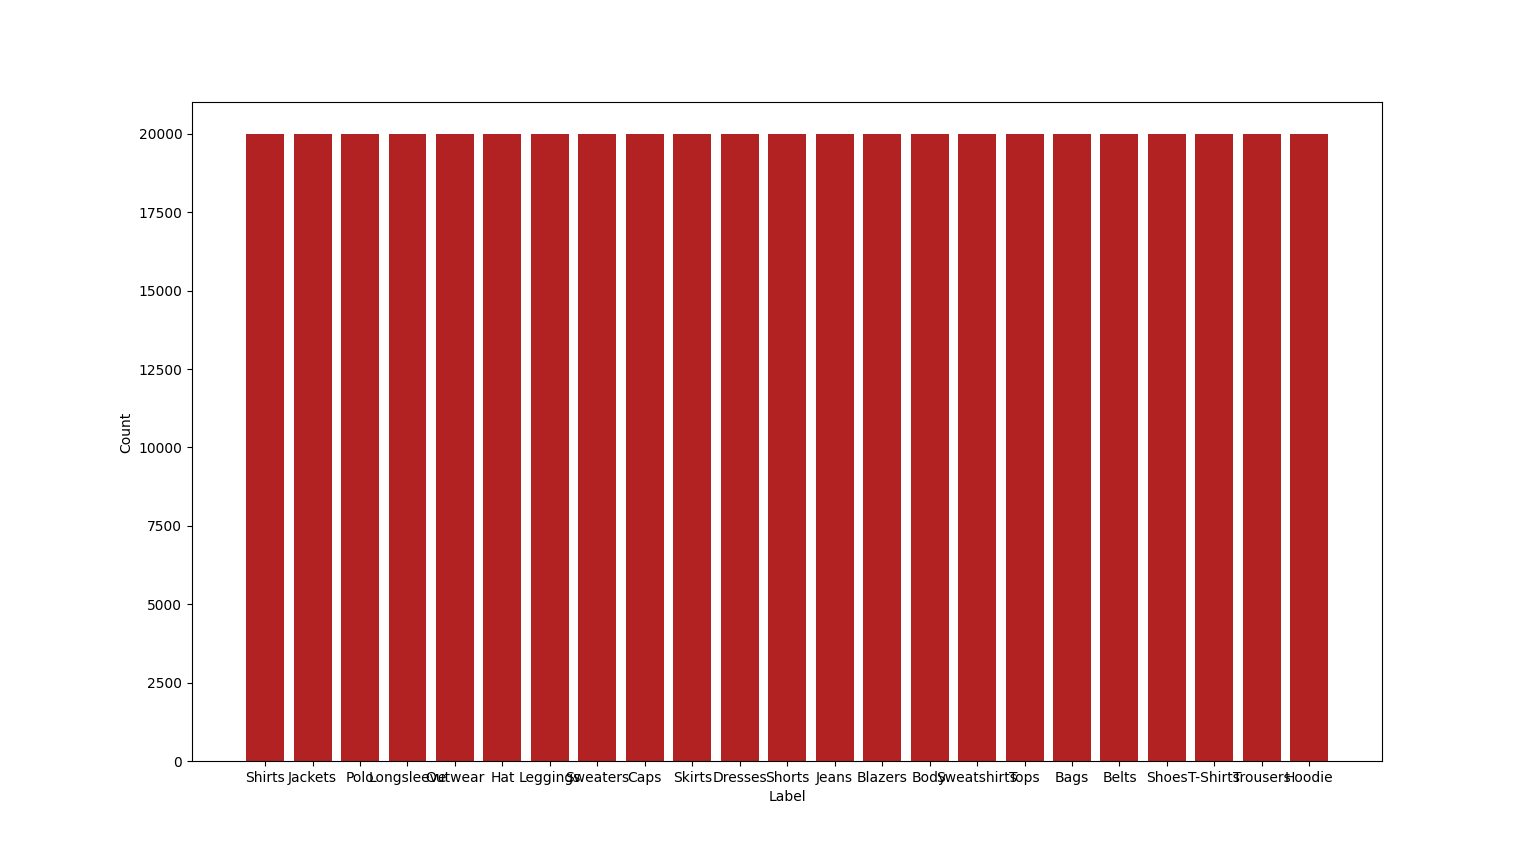
As you can see, the data got way more uniform after this, and then I just made sure to add some duplicates to actually get every category to 20k images.
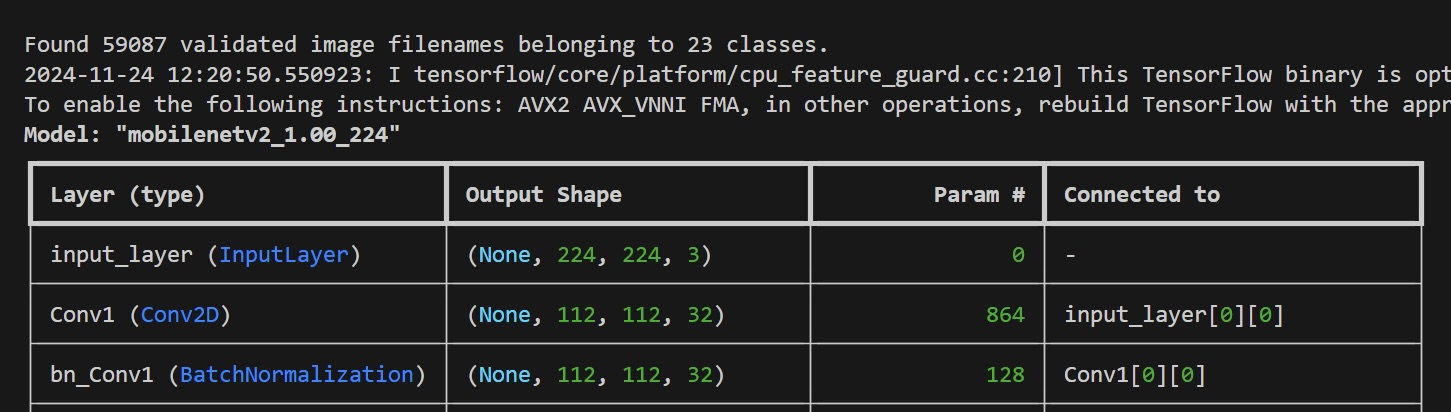
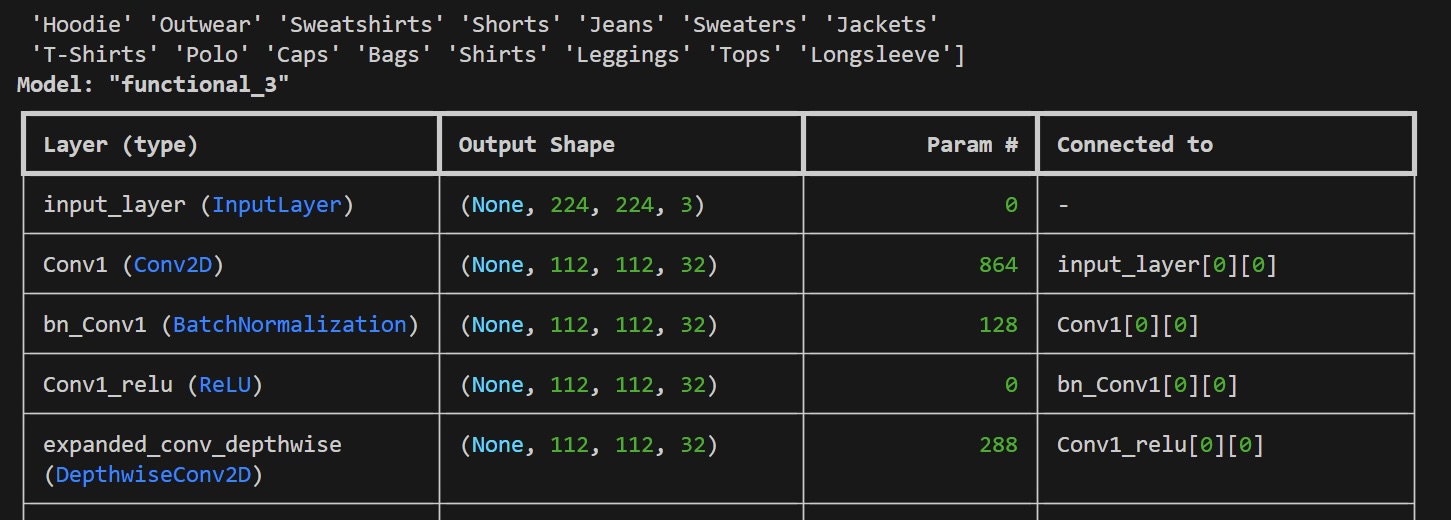
This is what we used to train the model:
1
2
3
4
5

from keras.applications import MobileNetV2

#We first load the MobileNetV2 model with imagenet weights (pre trained on 14 million images)
pre_trained_model = MobileNetV2(weights='imagenet', include_top=False, input_shape=(224, 224, 3))
1
2
3
4
5
6
7
8
9
10
11
12
13
14
15
16
17
18
print("Training the model...")

lr = 0.001
EPOCHS = 100


es = keras.callbacks.EarlyStopping(monitor='val_loss', mode='min', verbose=1, patience=10)
cb = keras.callbacks.ModelCheckpoint('mobilenetv2.keras', save_best_only=True)
lrr= keras.callbacks.ReduceLROnPlateau(monitor='val_accuracy', factor=.1, patience=5, min_lr=1e-5)

adam = keras.optimizers.Adam(learning_rate=lr)

model.compile(loss='categorical_crossentropy', optimizer=adam, metrics=['accuracy'])

adam = keras.optimizers.Adam(learning_rate=lr)
history = model.fit(train_data, validation_data=valid_data, epochs=EPOCHS, callbacks=[es, cb, lrr], class_weight=weights_as_ints)

print("Success!")
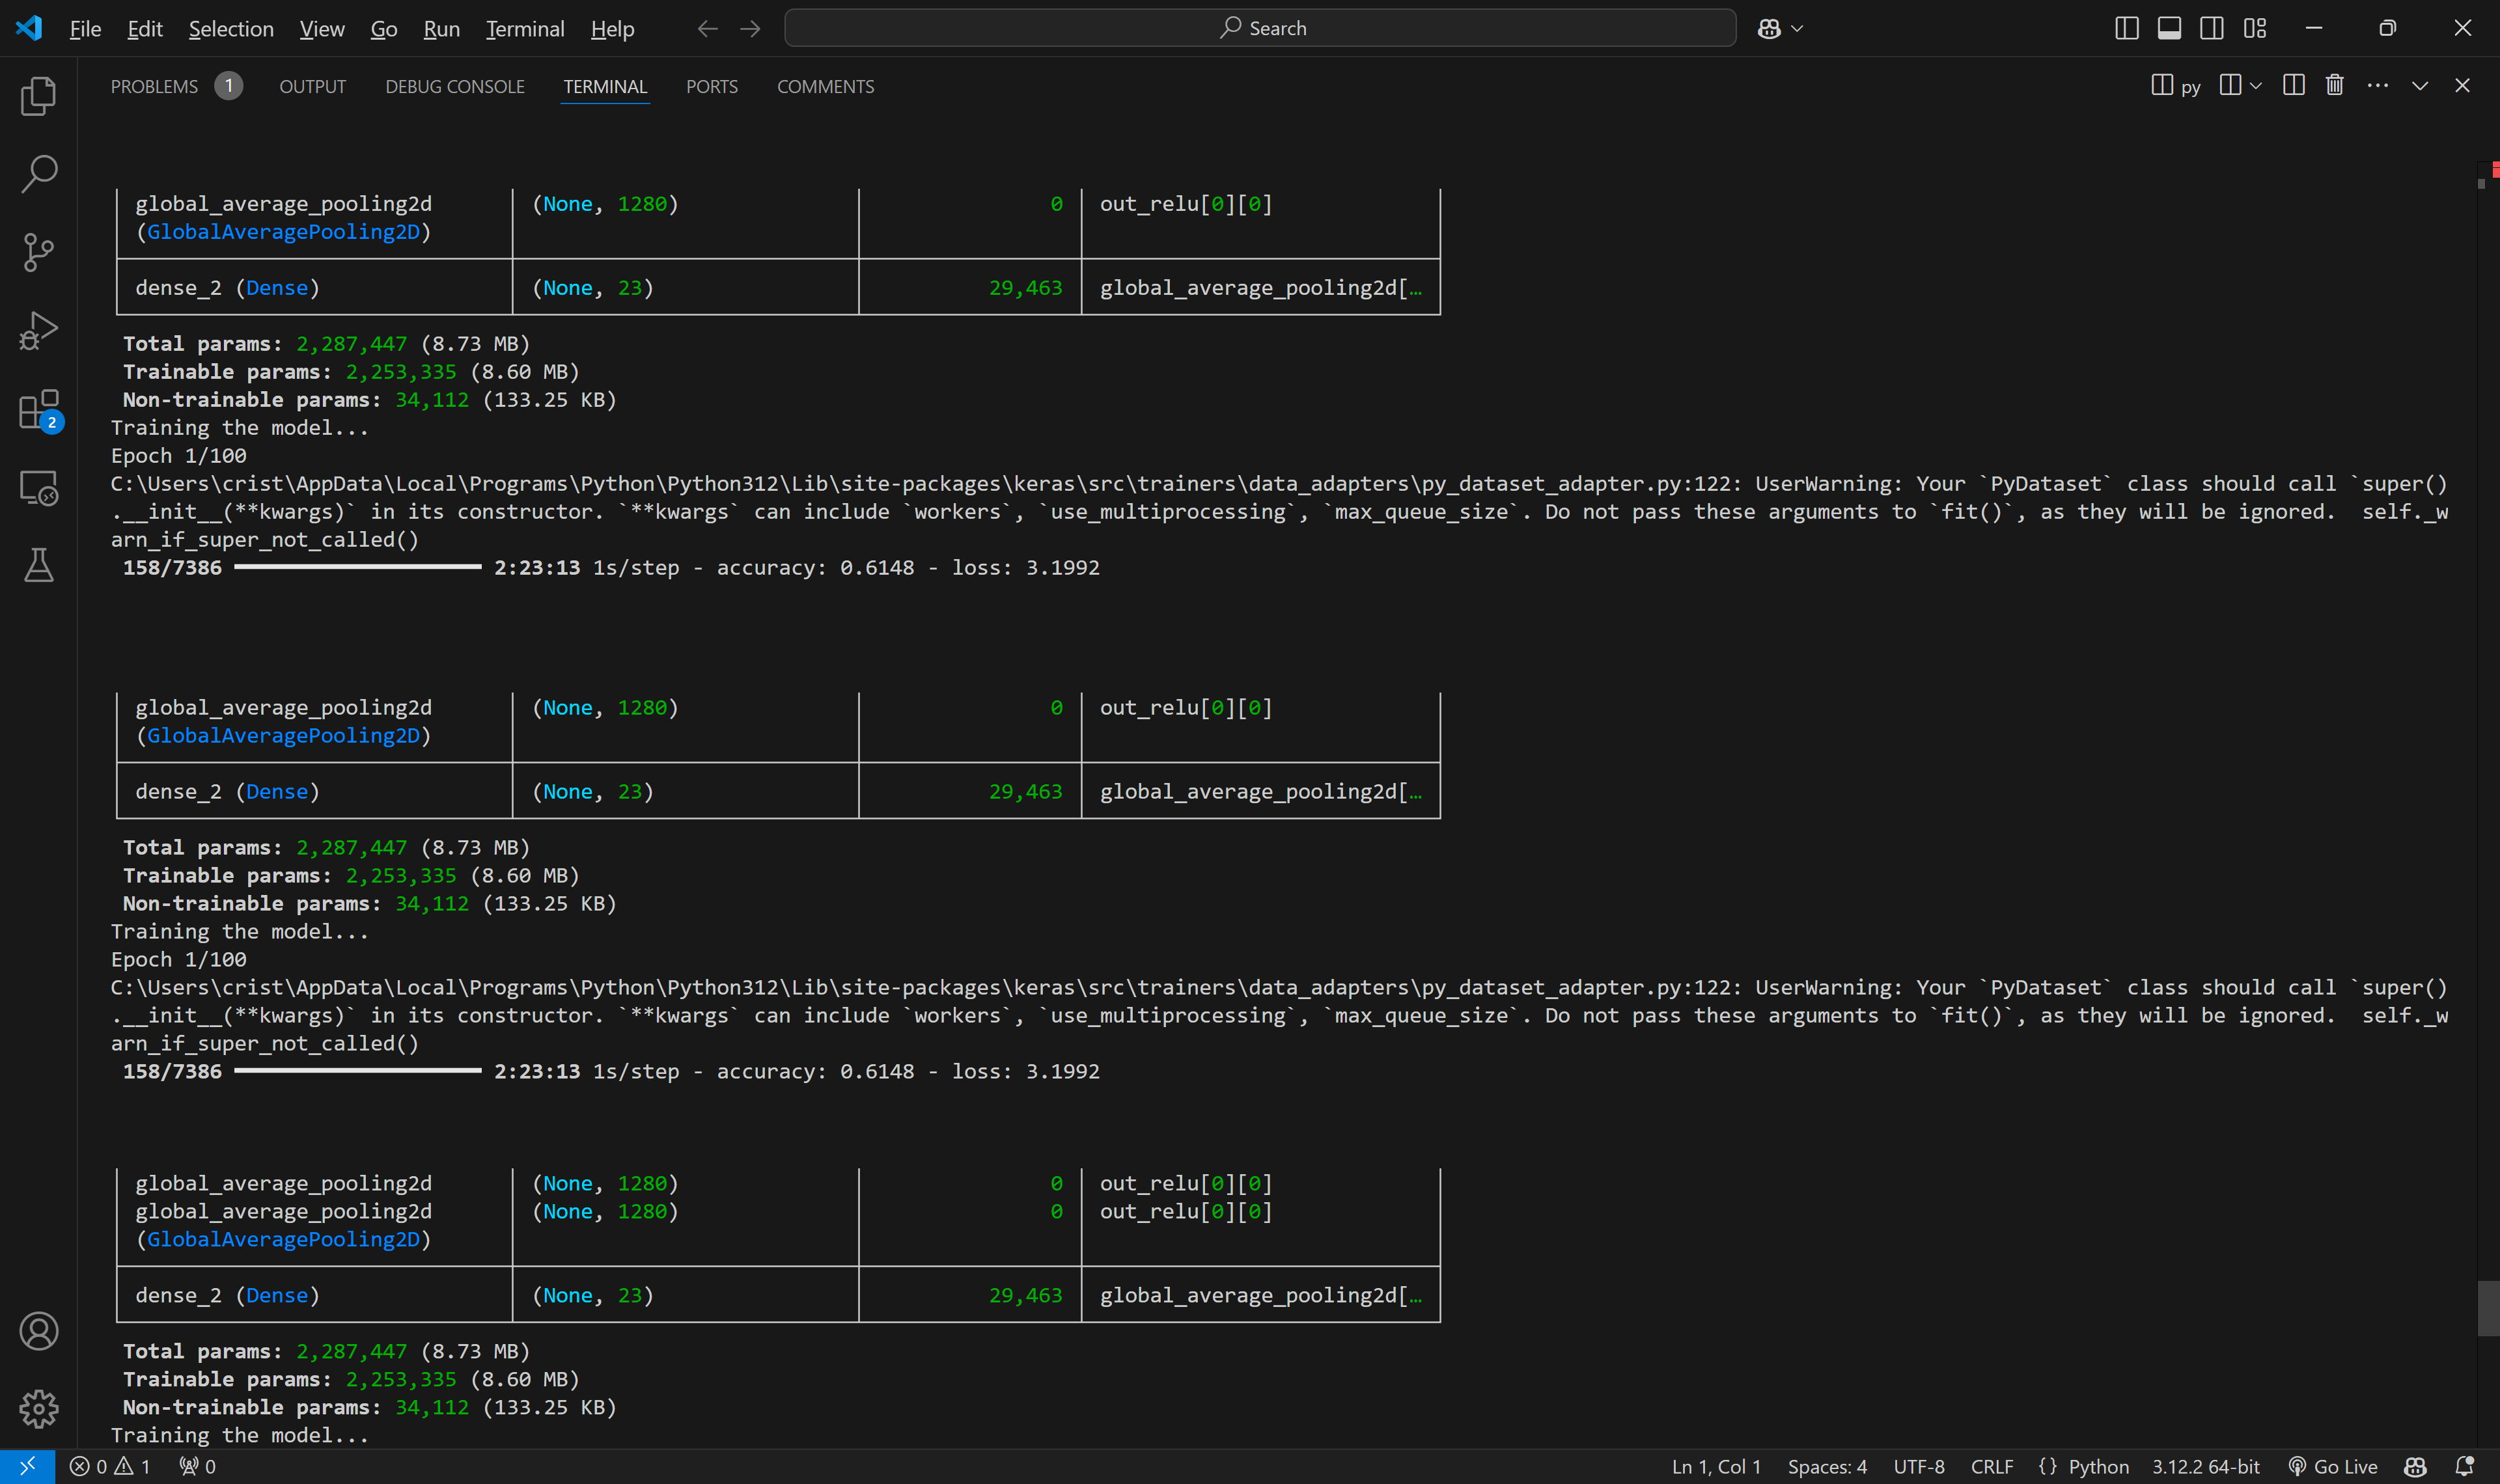
A considerable improvement; the first epoch already had, presumably, and accuracy of 60%, which was what the initial version achieved after 26 epochs.
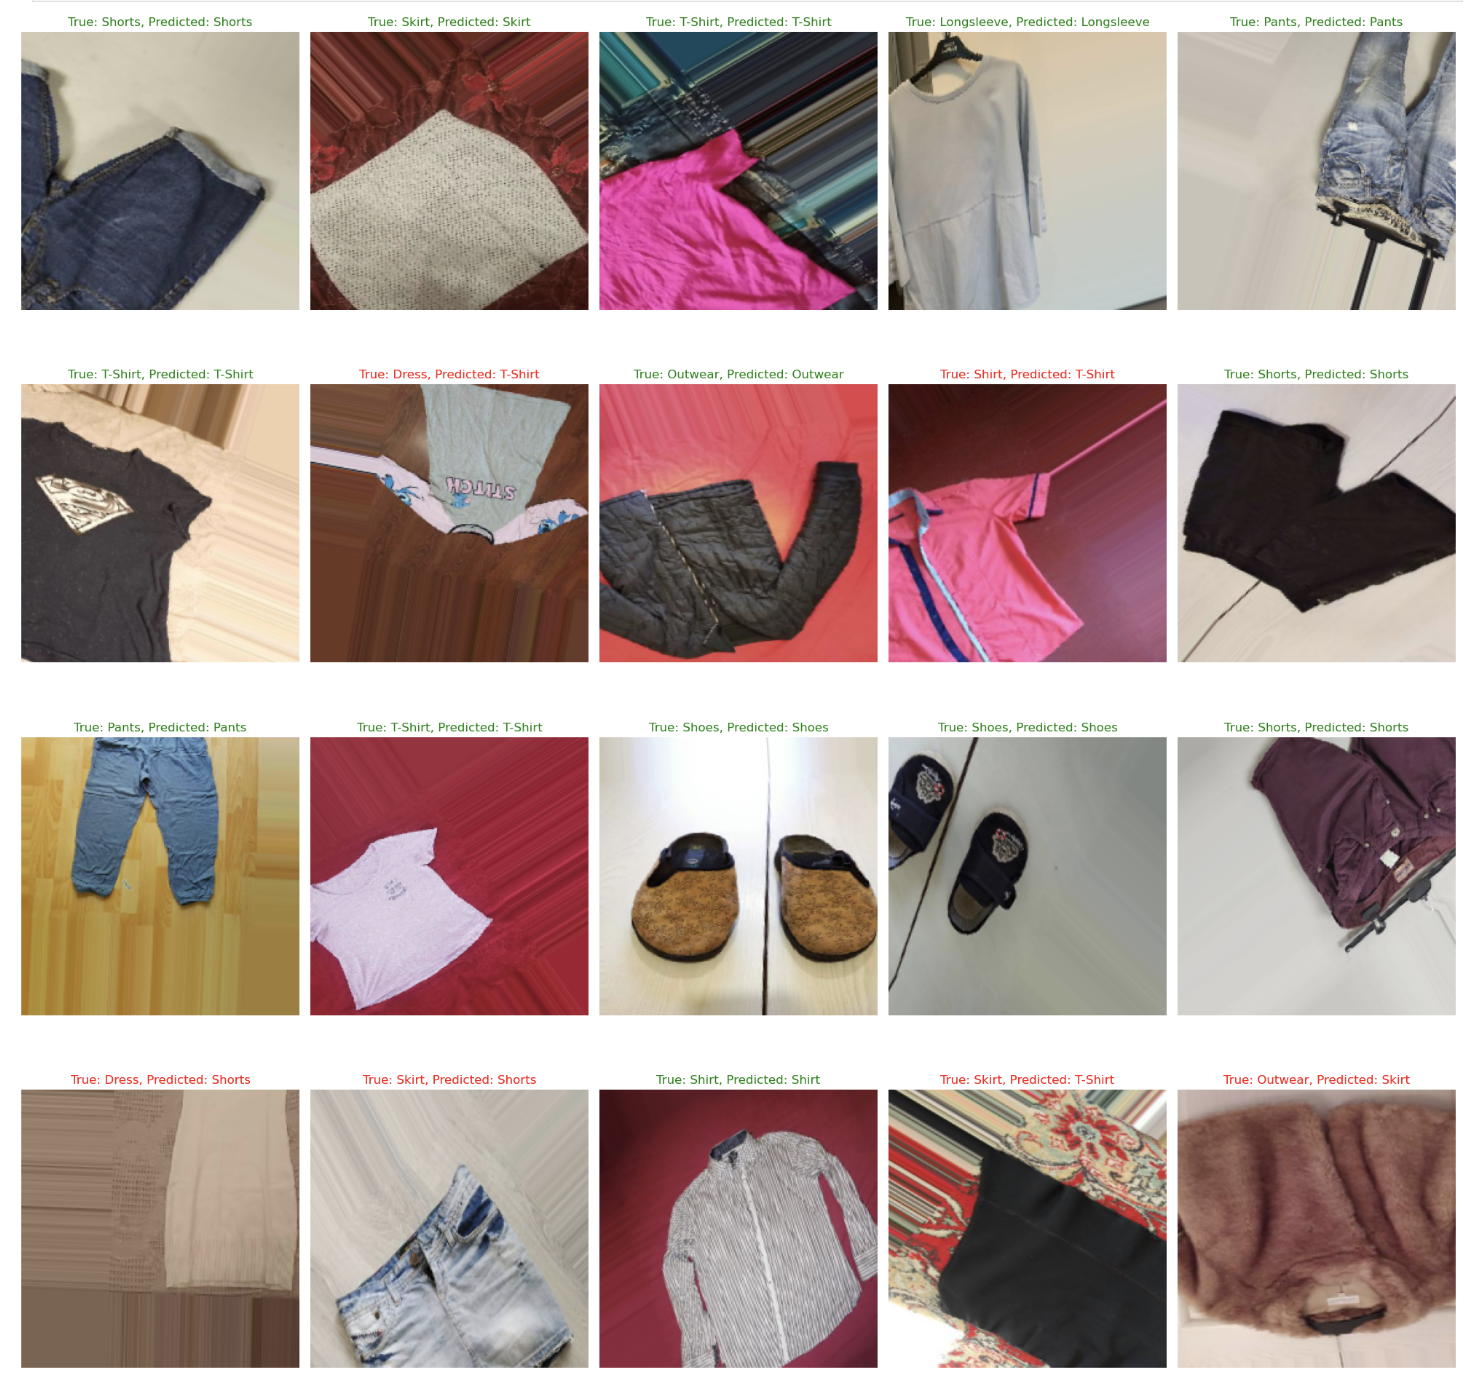
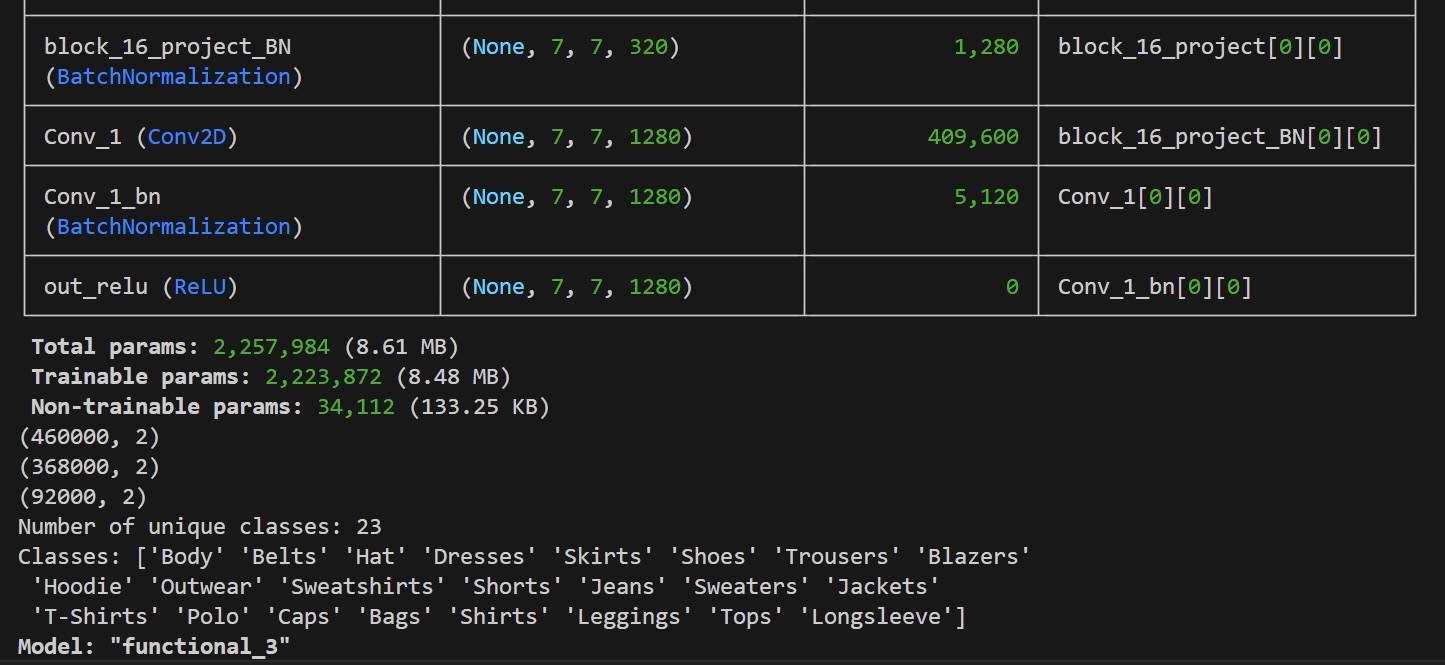
32k images later (using data augmentation to keep it as uniform as possible), I am happy to say I got the model to an astounding val_accuracy of 99% (and it took a full 10 days to train, I believe on AWS hahaha) for 23 categories. Of course, we should always be wary of val_accuracy as it may not be representative of performance due to underlying issues like uniformity or model architecture, but upon testing, ClothingCAT has been performing notoriously well.
Also, as a little extra bonus for all of our hard work, we recently got nominated by Tech South West Awards 2024 as Top 5 Best Application of AI!